Initial Setup
To fully utilize all the features of TRASAGATE, you need to complete the following setup steps.
1. Root Account Setup
Once the TRASAGATE server is up and running, you can access the TRASAGATE dashboard through a web browser by navigating to TRASA_HOST (which is either an IP address or domain name).
By default, a root user account is created with the default password changeme. As an administrator, you will need to set up this root account before you can access TRASAGATE.
Follow the steps detailed in the Account Setup Guide to complete the setup.
2. Initialize Encrypted Storage - TsxVault
TRASAGATE includes secure encrypted storage (TsxVault) to store service credentials like passwords, private keys, and integration keys. Follow the steps in the Initializing TsxVault Guide to enable secret storage.
3. Setup FCM with TRASAGATE FCM Proxy (Optional, Recommended)
TRASAGATE Push U2F is a convenient way to handle two-factor authentication (2FA). With Push U2F, users don't need to enter a six-digit TOTP code every time they need to verify the second step in the authentication process. This method is also immune to phishing attacks on TOTP codes.
To enable this feature, register with the TRASAGATE FCM Proxy to allow push notifications to users' mobile devices.
4. Email Setup (Optional, Recommended)
To receive emails and security alerts from TRASAGATE, you need to integrate TRASAGATE with your existing email provider. Follow the Email Setup Guide to configure your email settings.
5. Configuring Network Firewall (Optional, Recommended)
TRASAGATE Access Proxy can only control access if traffic passes through it. To ensure that security policies are enforced by the access proxy, you should configure a network firewall so that every remote access to your servers and services is only routed through the IP address of the TRASAGATE server.
TRASAGATE also supports native two-factor authentication integration (with installable agents that protect Windows servers, Linux servers, and hardware appliances). If you are using TRASAGATE solely for native two-factor authentication, you can skip configuring your network, as agents will communicate with the TRASAGATE server for authorization.
Create a Security Group for TRASAGATE
In the EC2 management console:
- Go to Security Groups.
- Click the Create Security Group button.
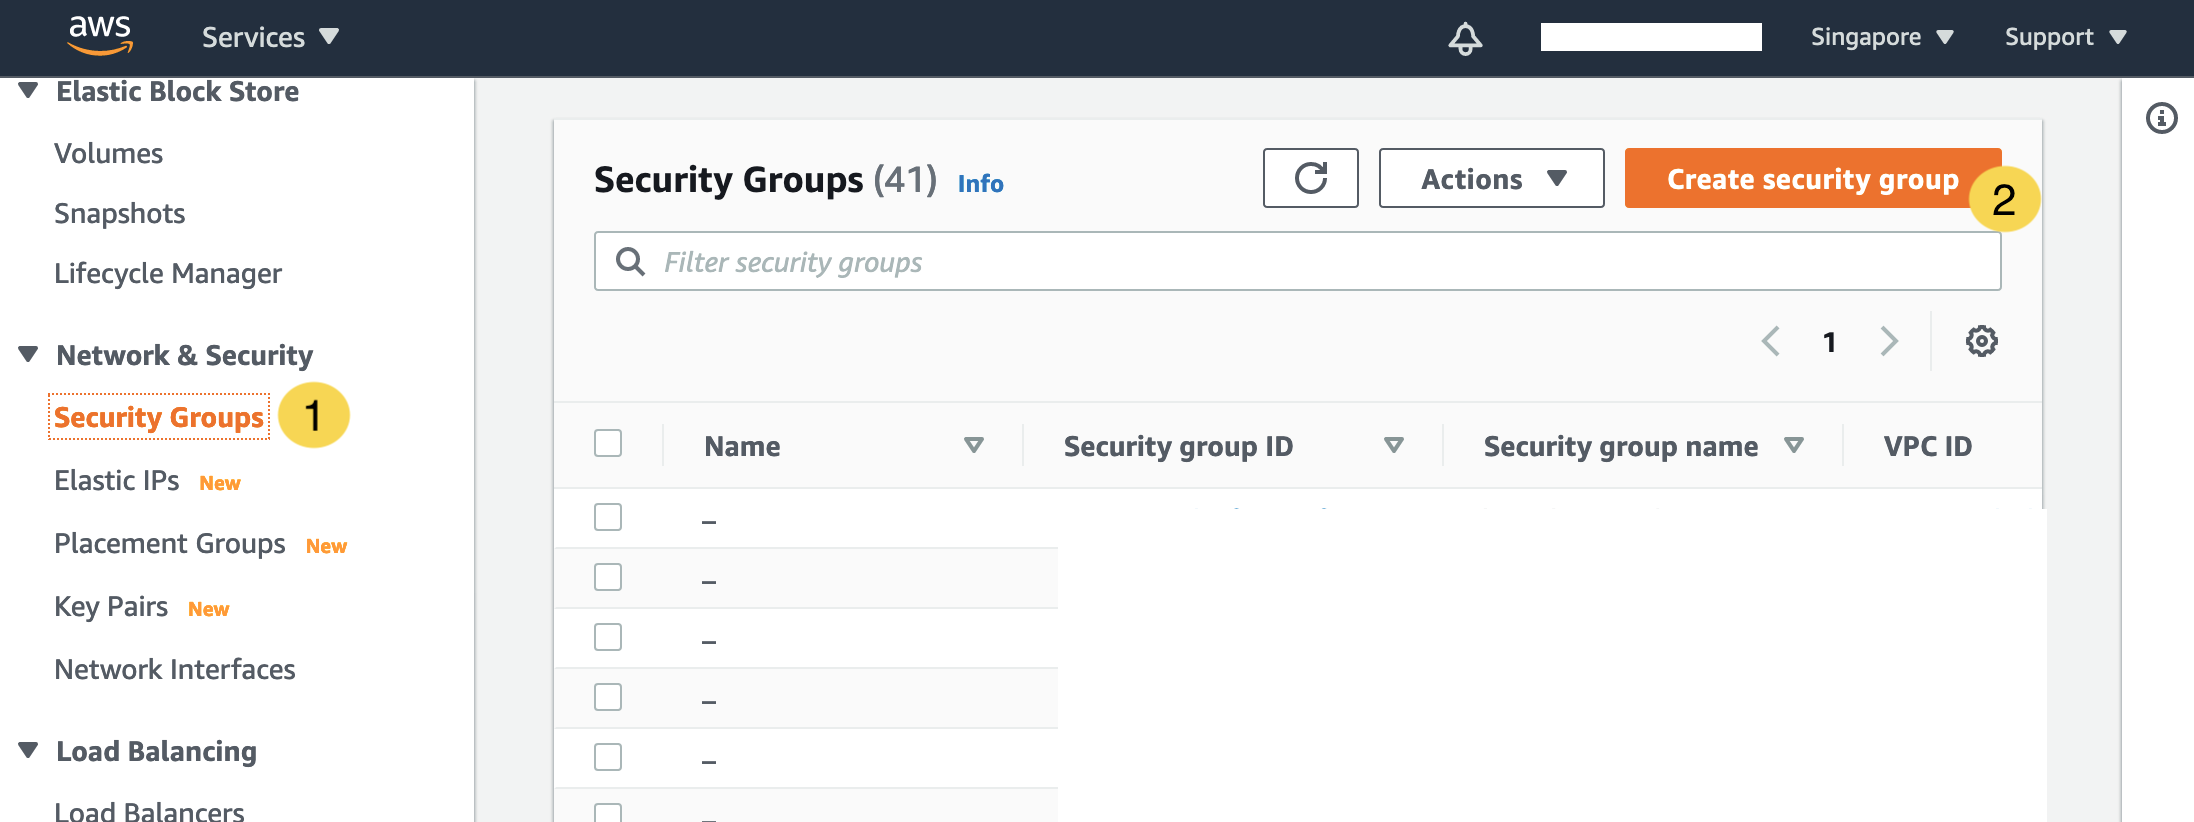
- Fill in the name and description.
- In the Inbound Rules section, click the Add Rule button.

- Choose the SSH type and Custom source.
- Add the TRASAGATE IP in the Source IP field.
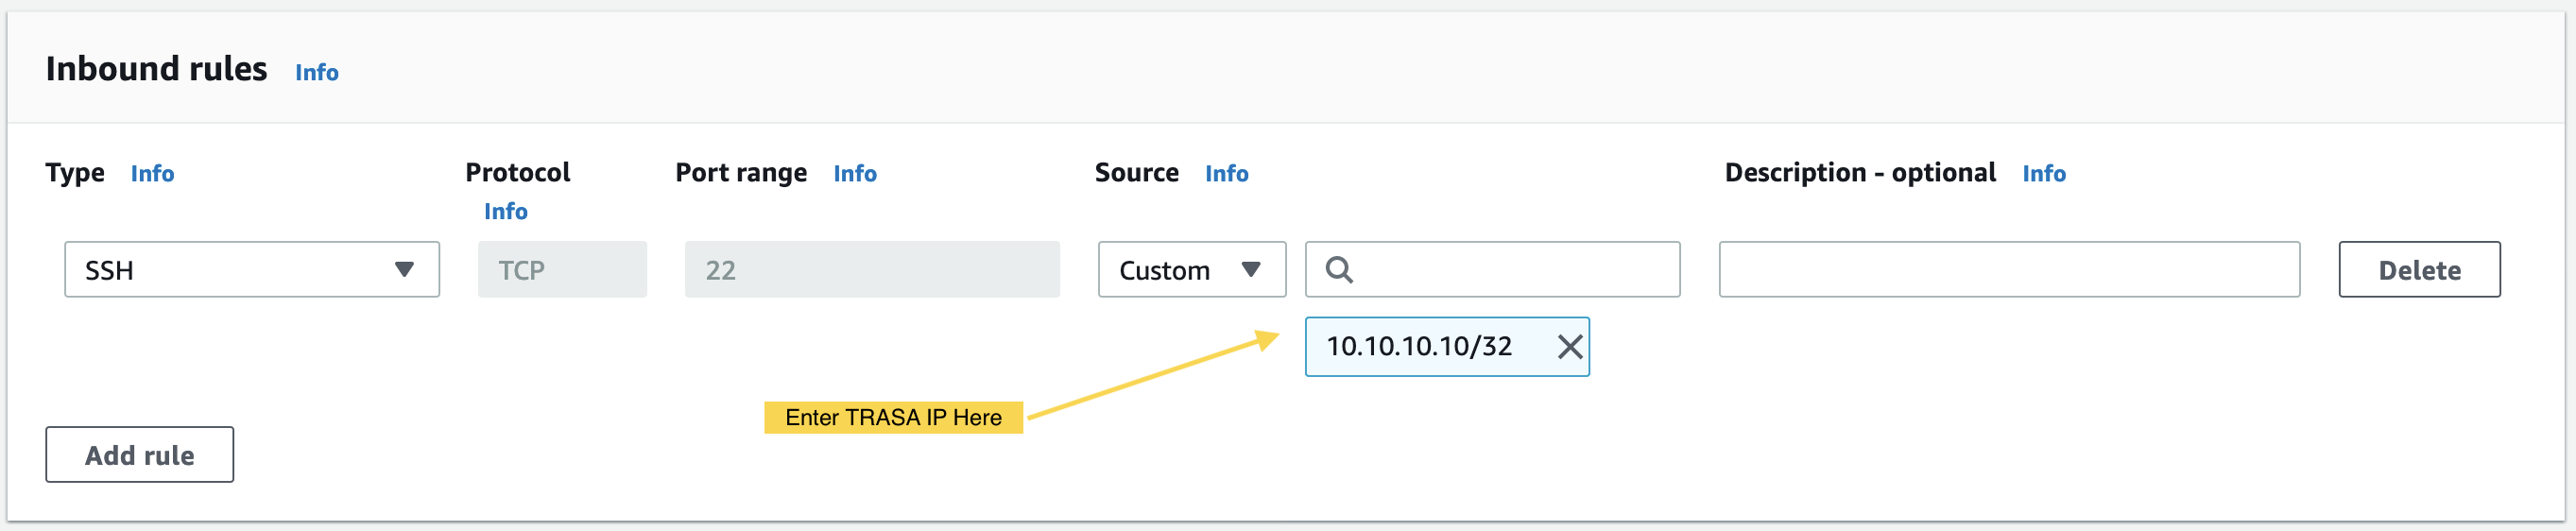
Now, use this security group to allow SSH access to all instances you want to protect with TRASAGATE.
Create a Firewall Rule for TRASAGATE
We will create two rules: one to block all remote access requests (block-all-remote) and one to allow requests from TRASAGATE (allow-from-trasa).
If two rules have the same priority value, the blocking rule will override, so we will give allow-from-trasa higher priority than block-all-remote.
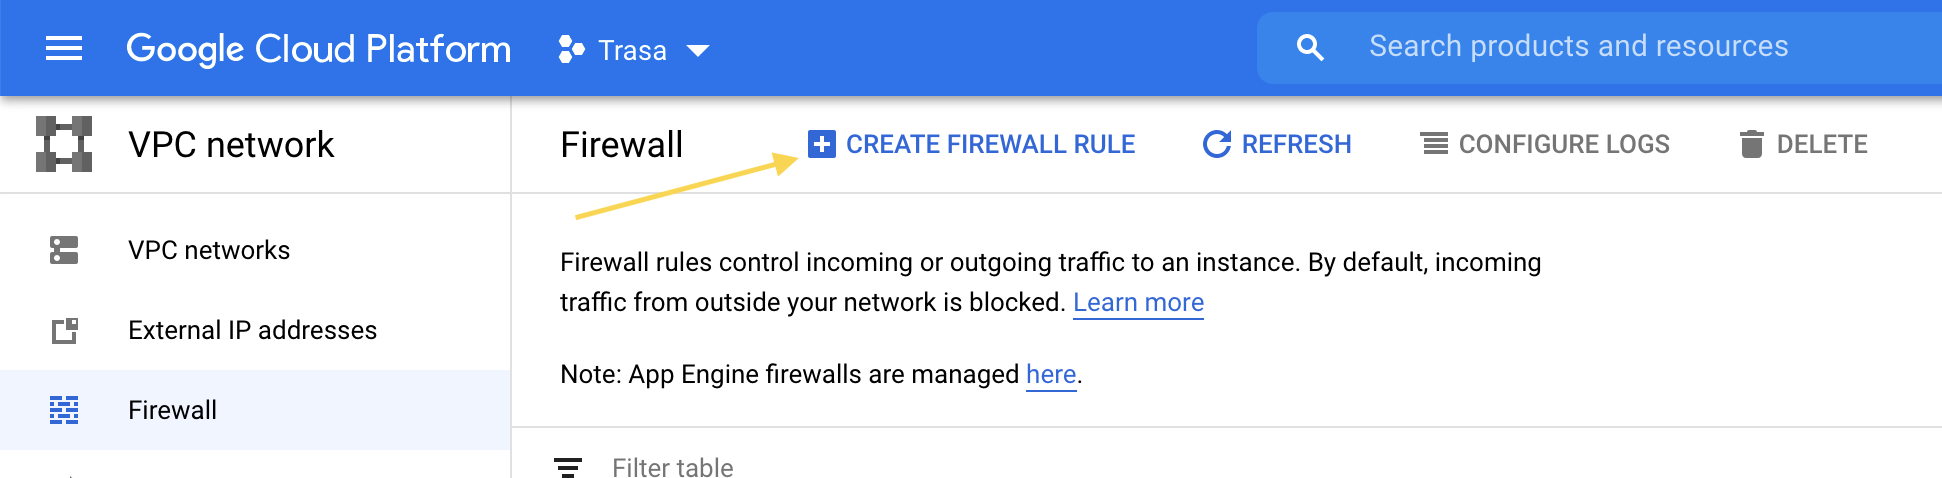
- Go to VPC Network > Firewall in the main menu.
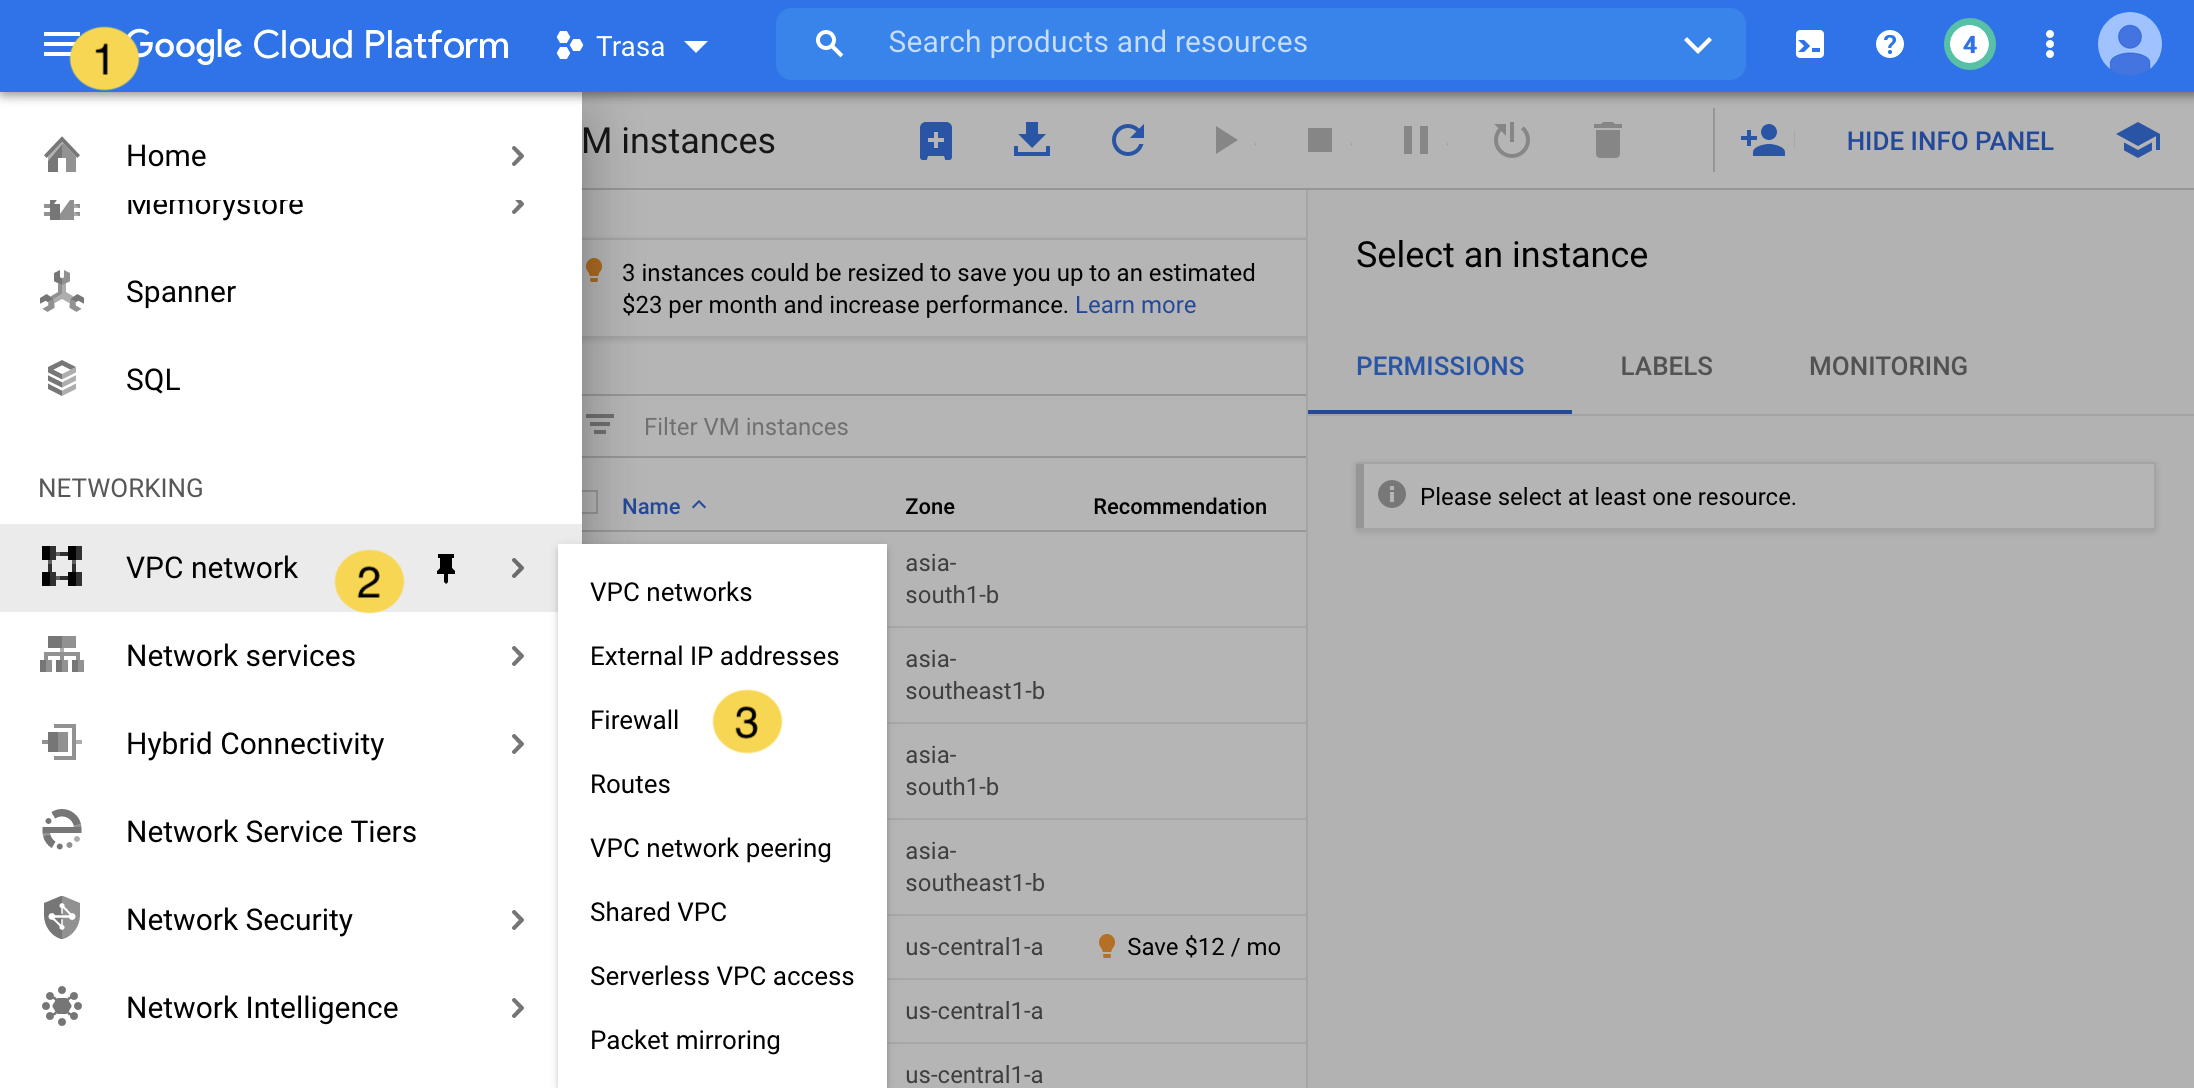
- Click the Create Firewall Rule button.
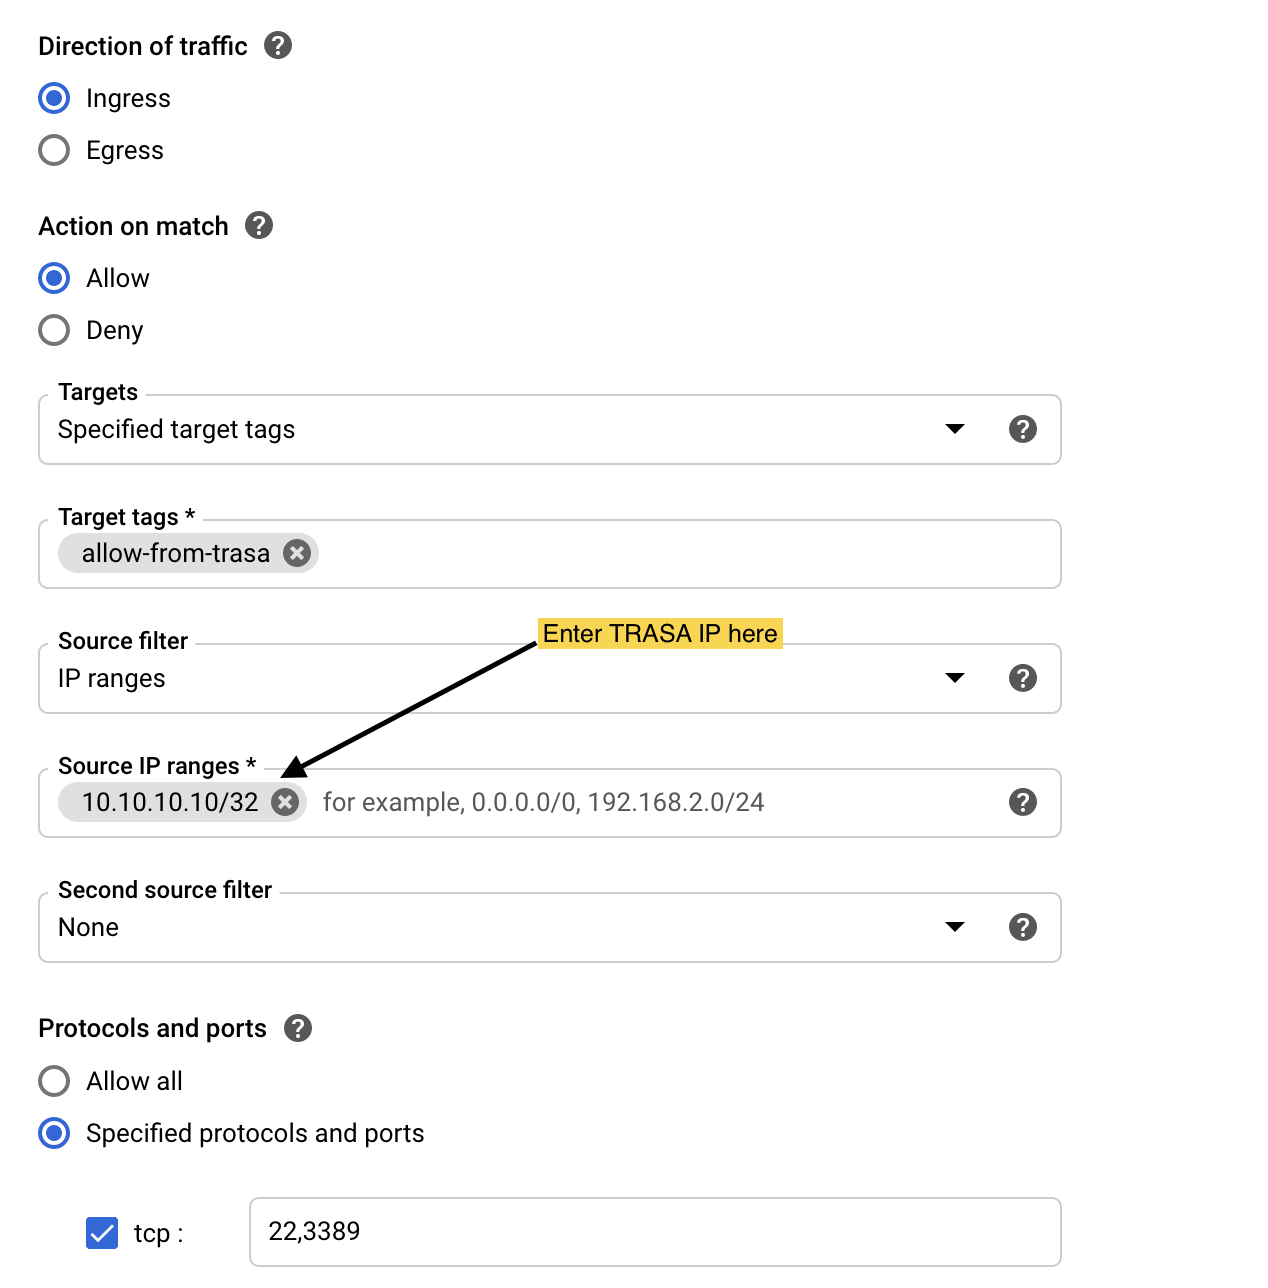
- Fill in the following parameters:
- Target tag name:
allow-from-trasa - Action on match: Allow
- Source IP range: [TRASA_IP]
- Ports and protocols:
tcp:22, tcp:3389 - Priority: 999
- Target tag name:
- Create another rule with the following parameters:
- Target tag name:
allow-from-trasa - Action on match: Deny
- IP source:
0.0.0.0/0 - Ports and protocols:
tcp:22, tcp:3389 - Priority: 1000

- Target tag name:
You can assign different priority values and target tag names. Just ensure that allow-from-TRASAGATE has higher priority than block-all-remote.
Learn more about priority here.
Use these two firewall rules for all instances you want to protect with TRASAGATE.
Create a Firewall Rule for TRASAGATE
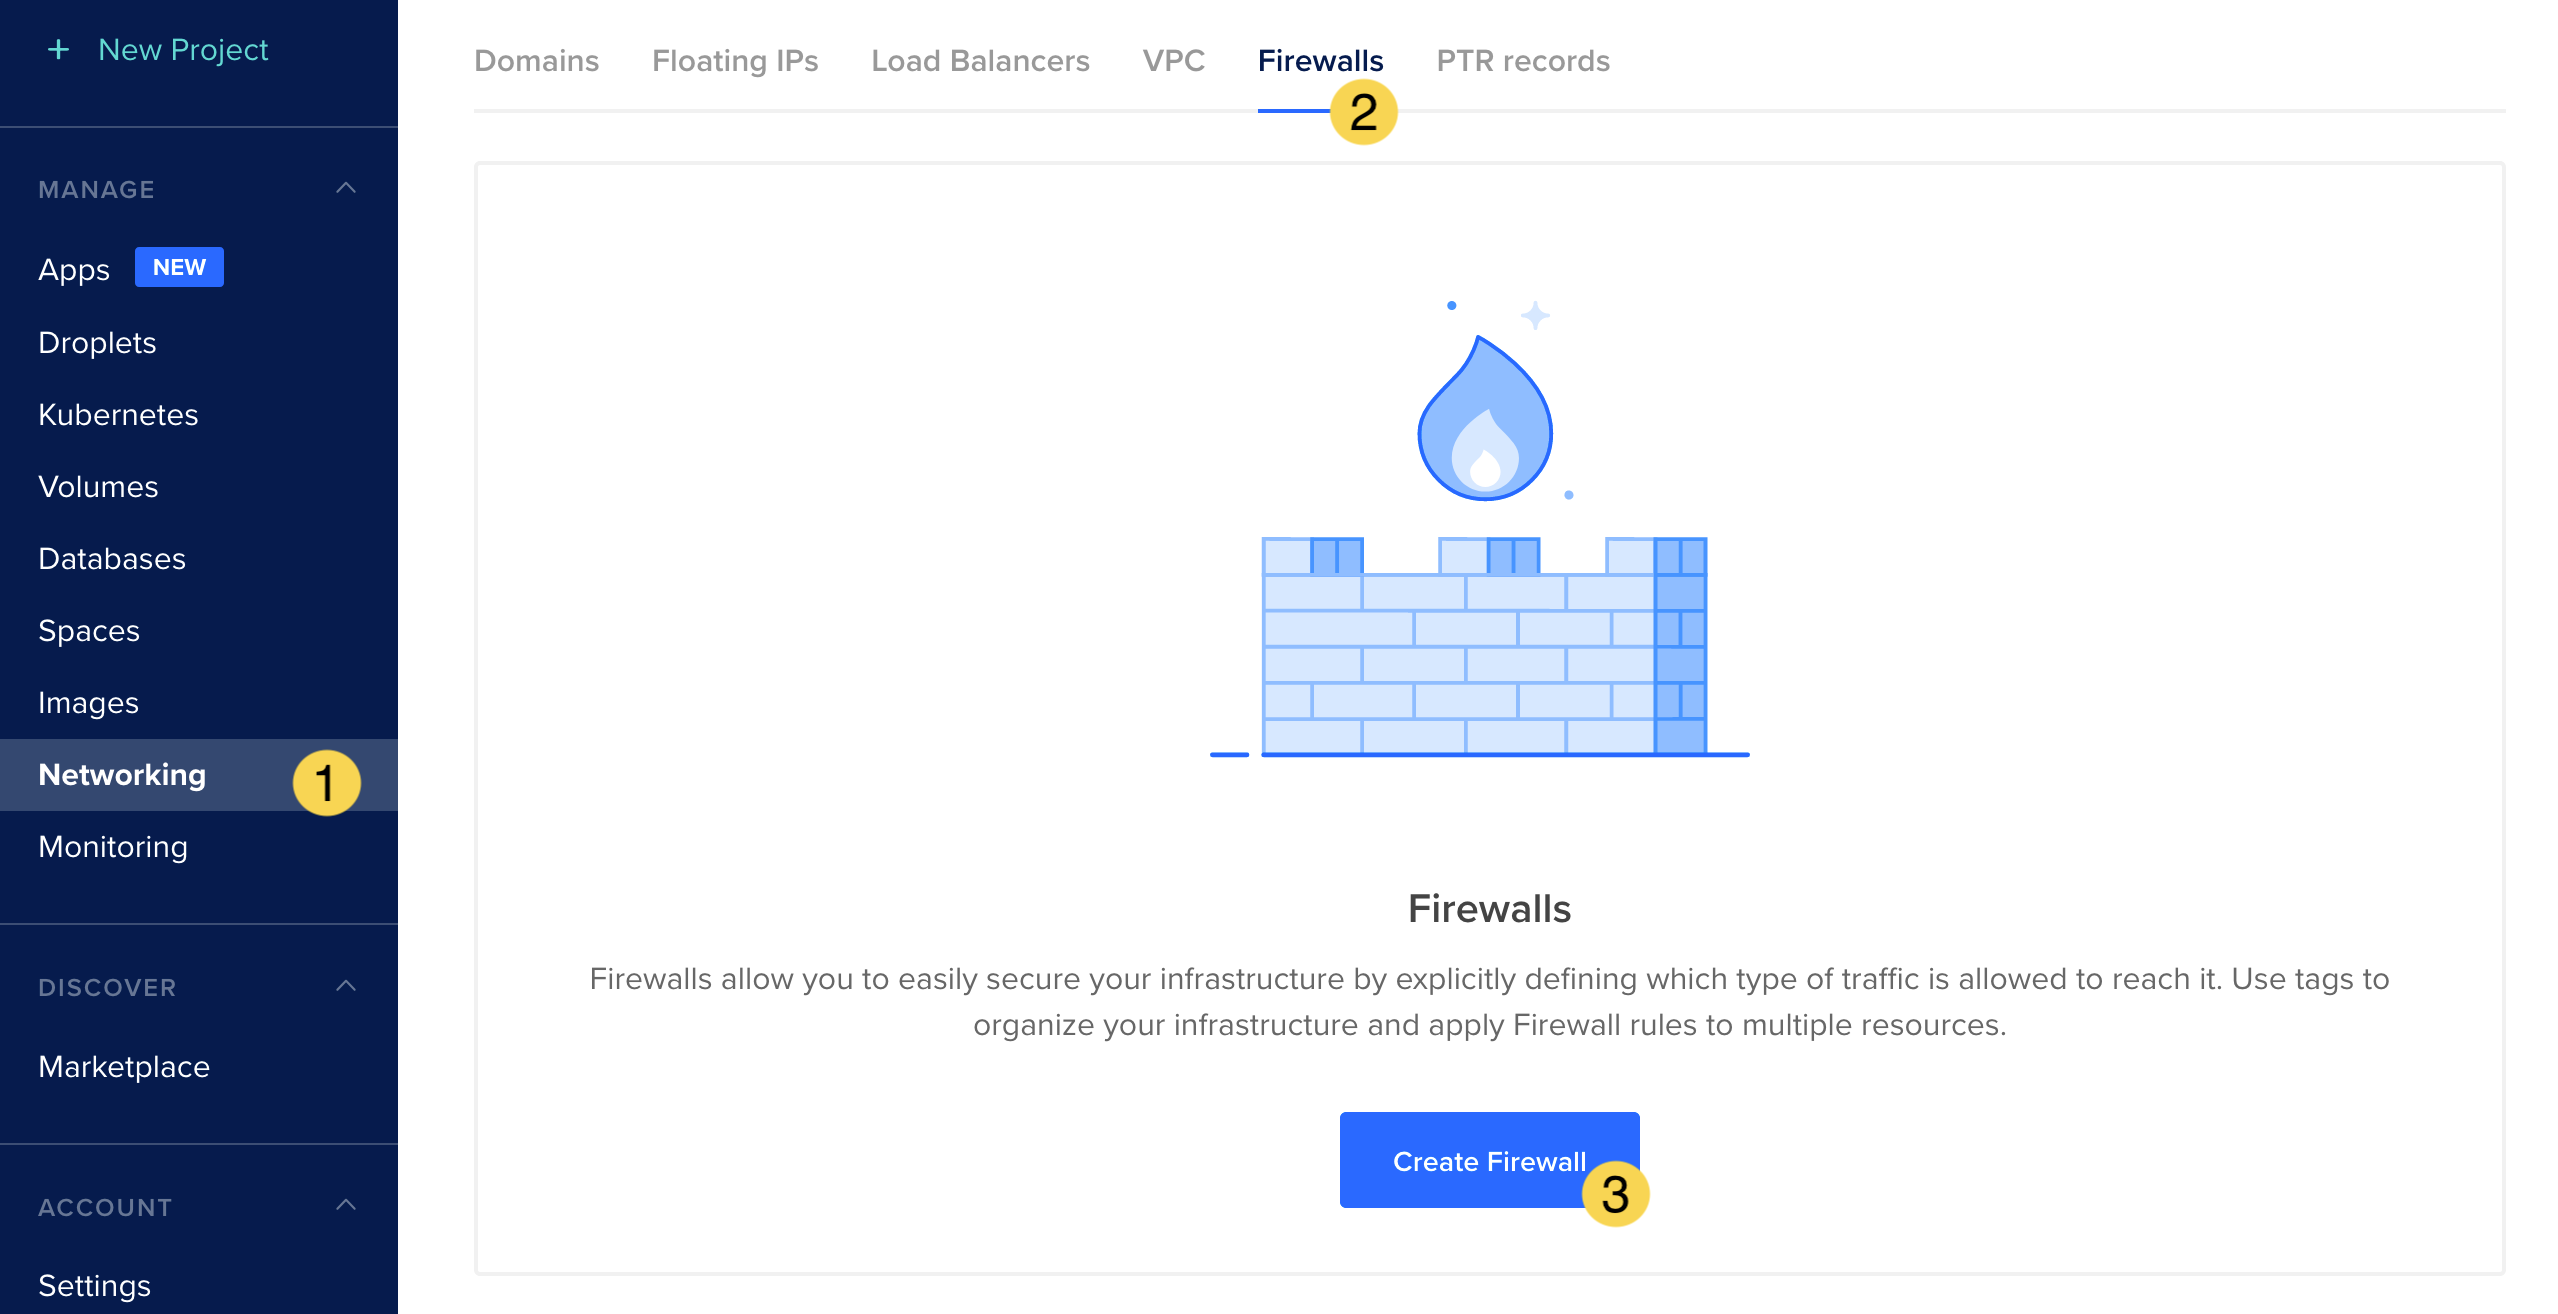
- Go to the Networking section from the main menu.
- Navigate to the Firewalls tab.
- Click the Create Firewall button.
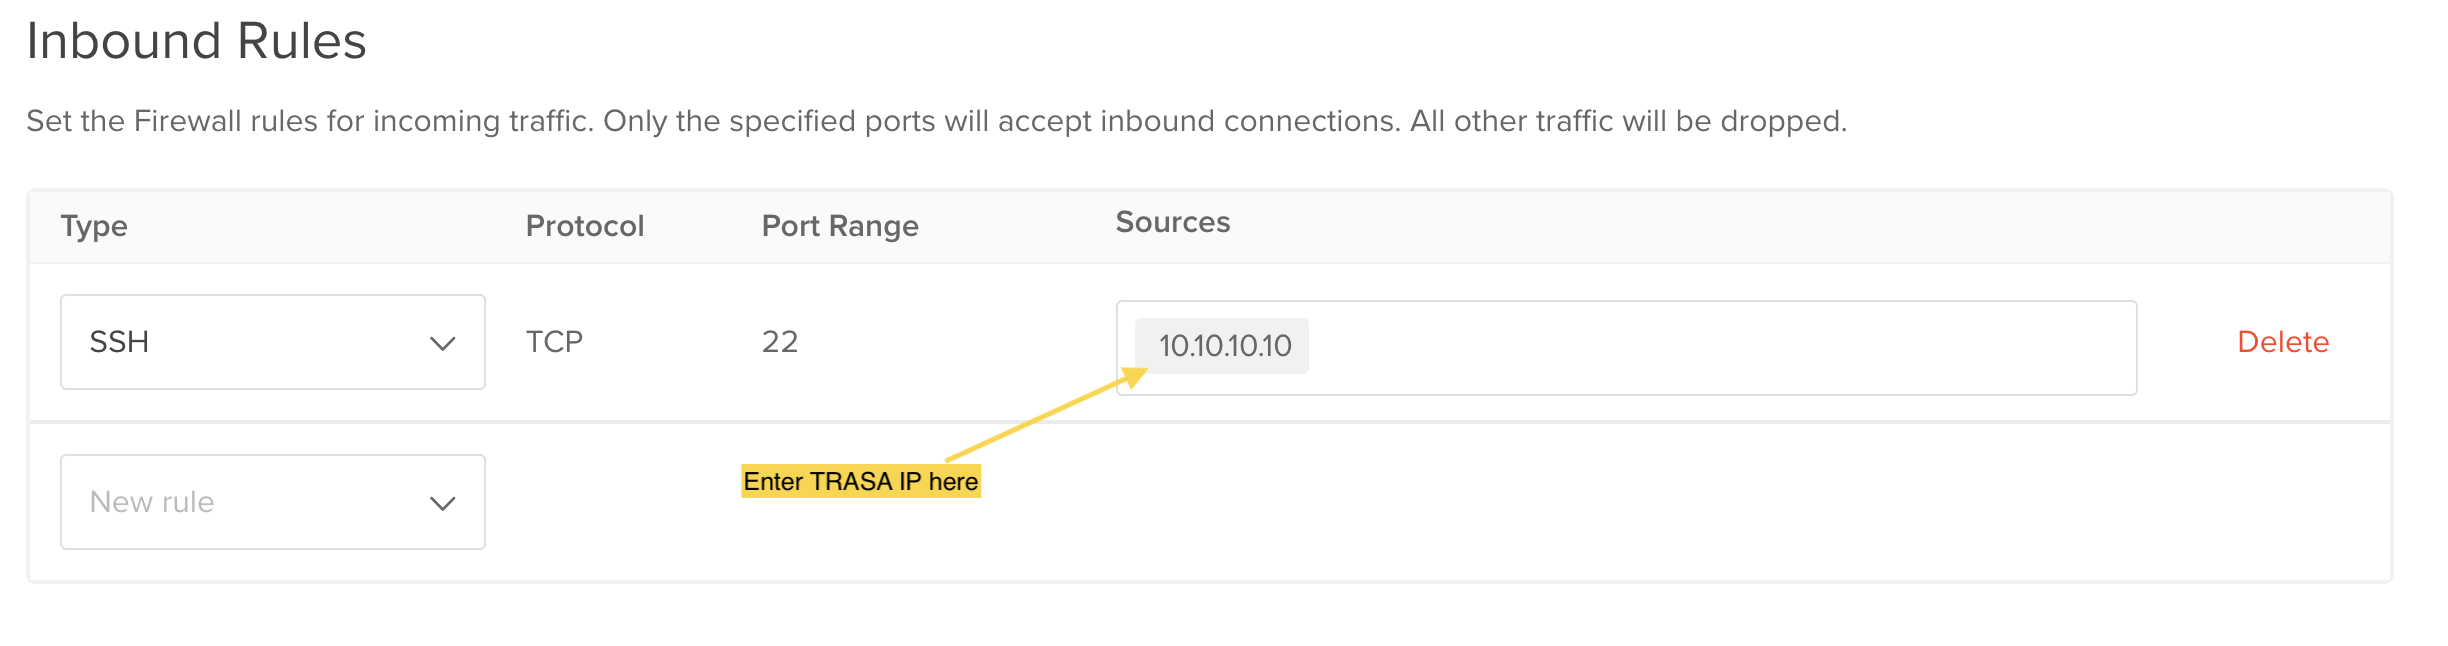
- Fill in the name and description.
- Enter the TRASAGATE IP as the source IP in the inbound rules.
- Enter a tag name to apply this rule.
- Click the Create Firewall button.
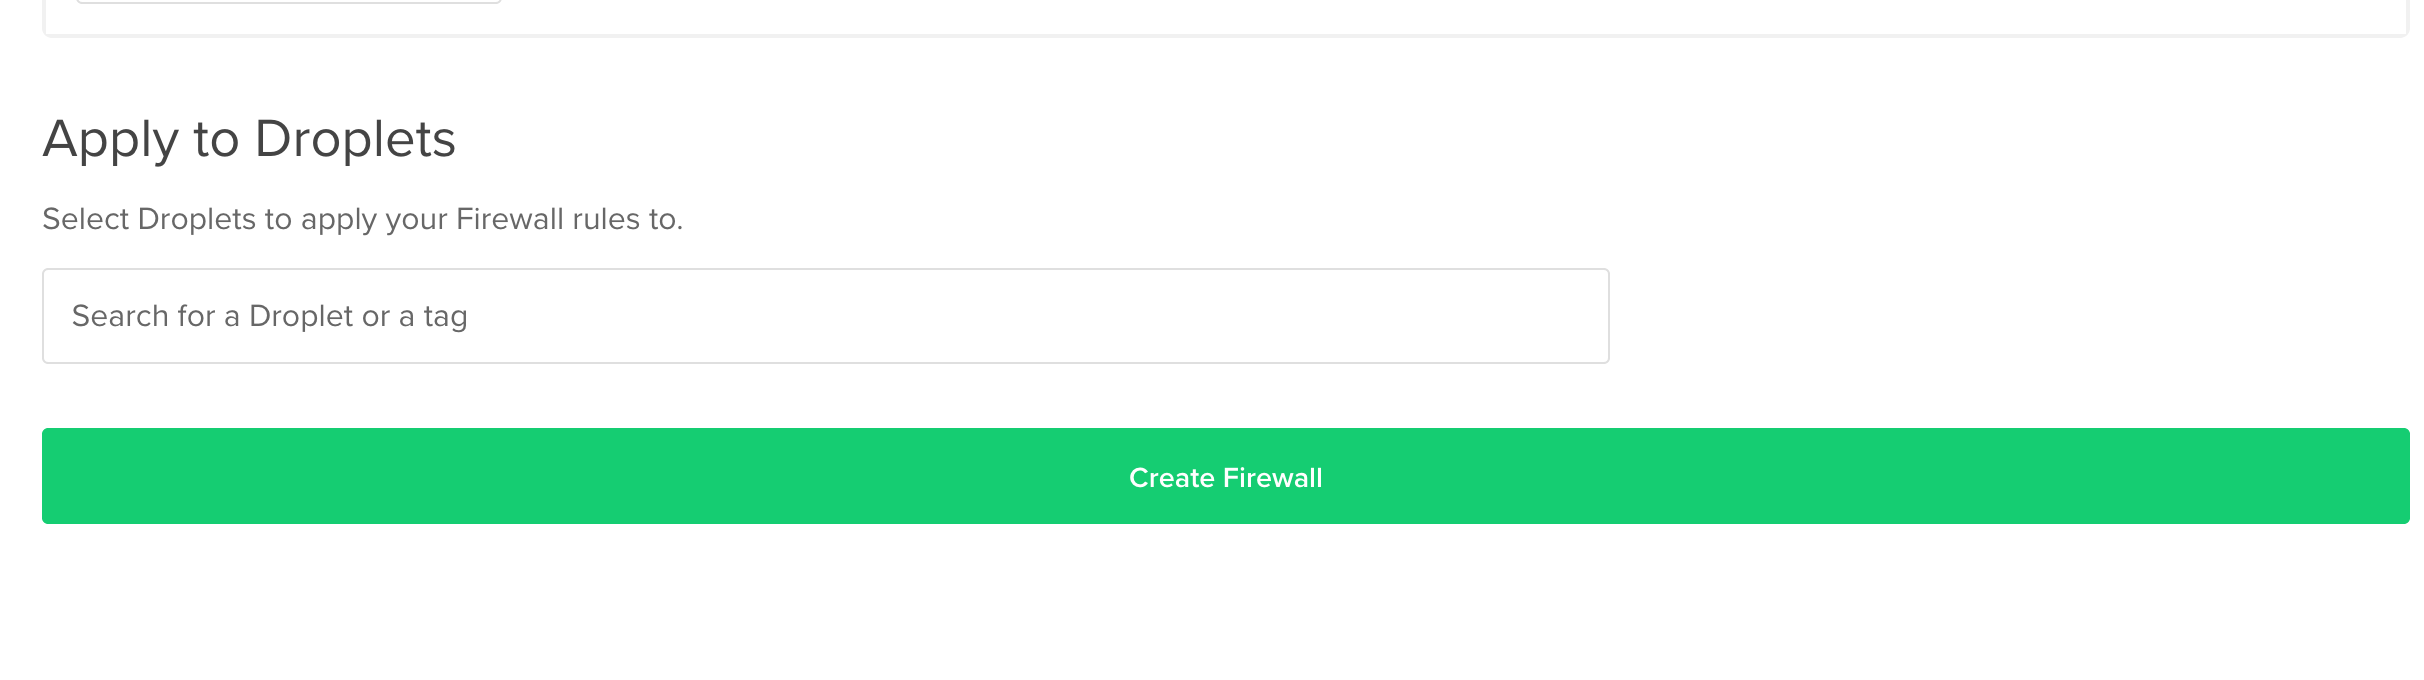
Use this firewall rule to grant SSH access to all droplets you want to protect with TRASAGATE.